How to Set up Digital Science Notebooks with Google Slides
Do you want to use digital science notebooks with your students, using Google Slides, but you’re not sure where to begin? Don’t let that hold you back!

written by
Karen Sinai
juneHow to Set up Digital Science Notebooks with Google Slides
June 2021
I’ve been using digital notebooks for many years now and I’m going to take you through step-by-step on how to set them up with your students. You’ll see how easy and straightforward they really are and there are so many rewards! See 15 Super Benefits of Digital Science Notebooks
Note: I will be taking you through the directions on the Google Slides app but it is easy to figure it out on a desktop as well.
Have Students Create a New Presention
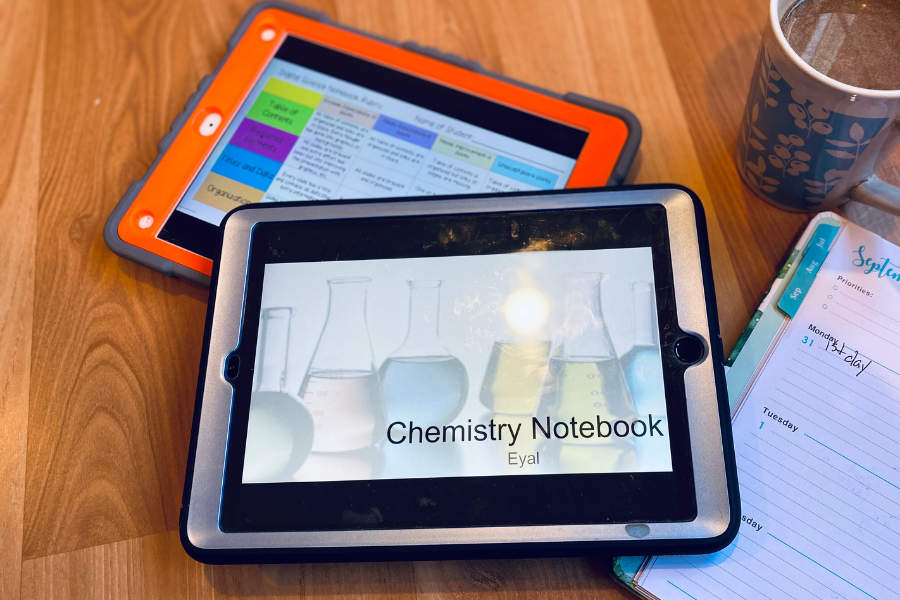
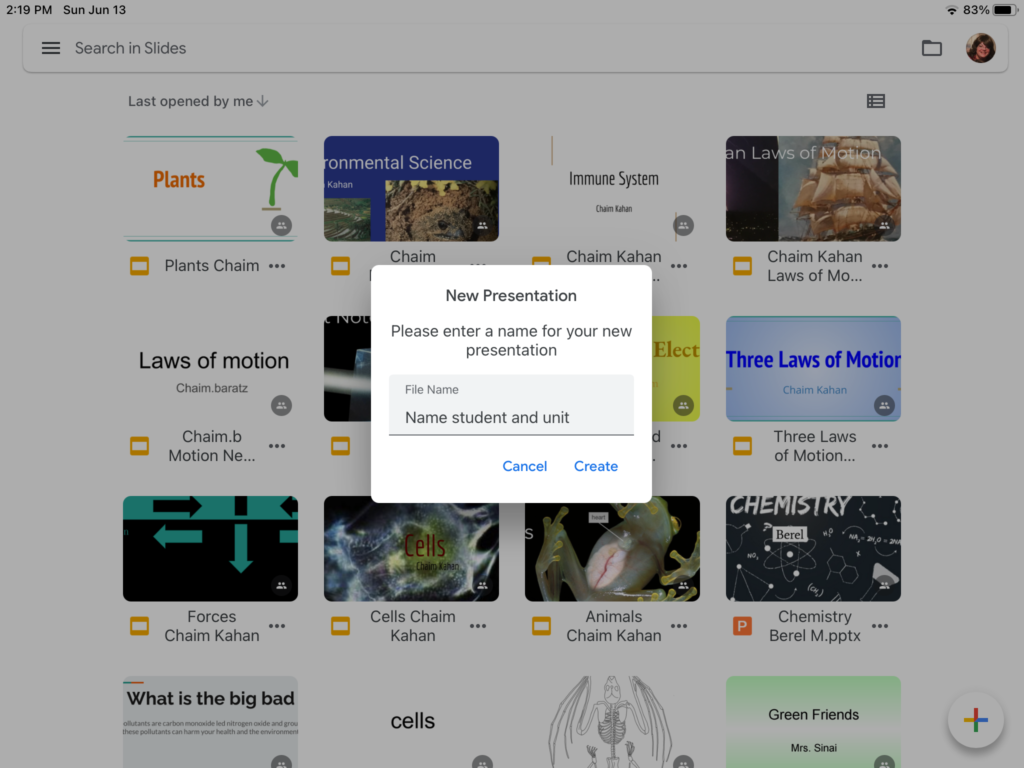
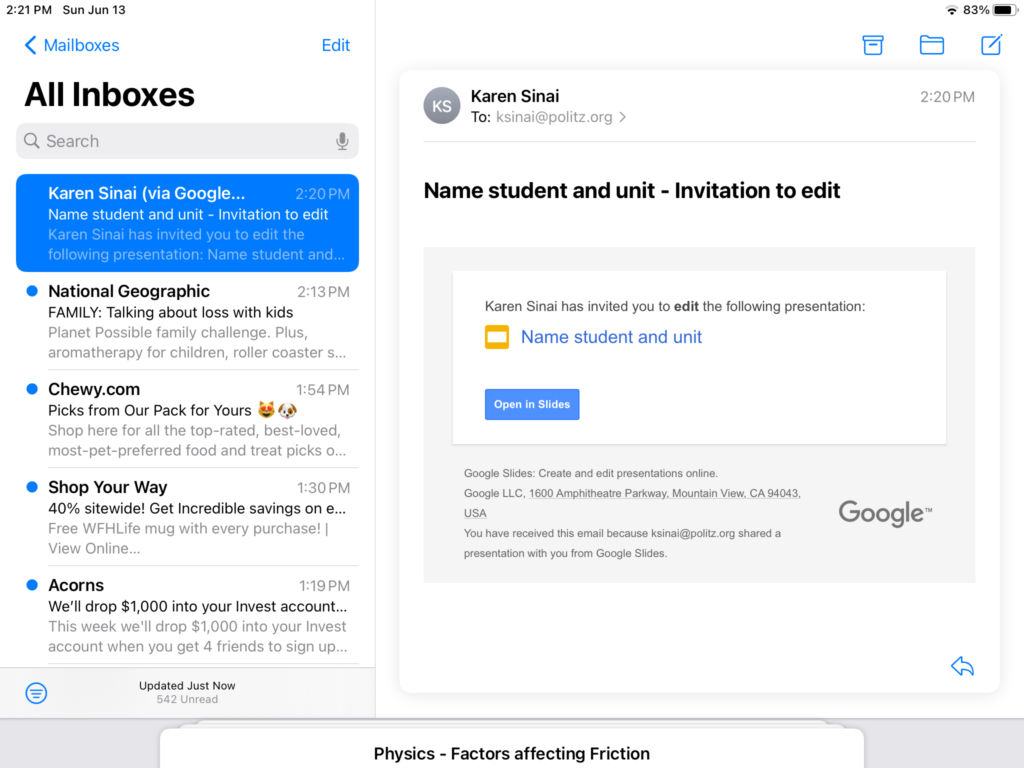
Using either the Google Slides app or the website, have the students create a new presentation by hitting the +. The title of the presentation is important so the student should make sure to include their own name and the name of the unit. This way, when they share it with you, it is apparent who it belongs to because it comes up in the subject part of your email.
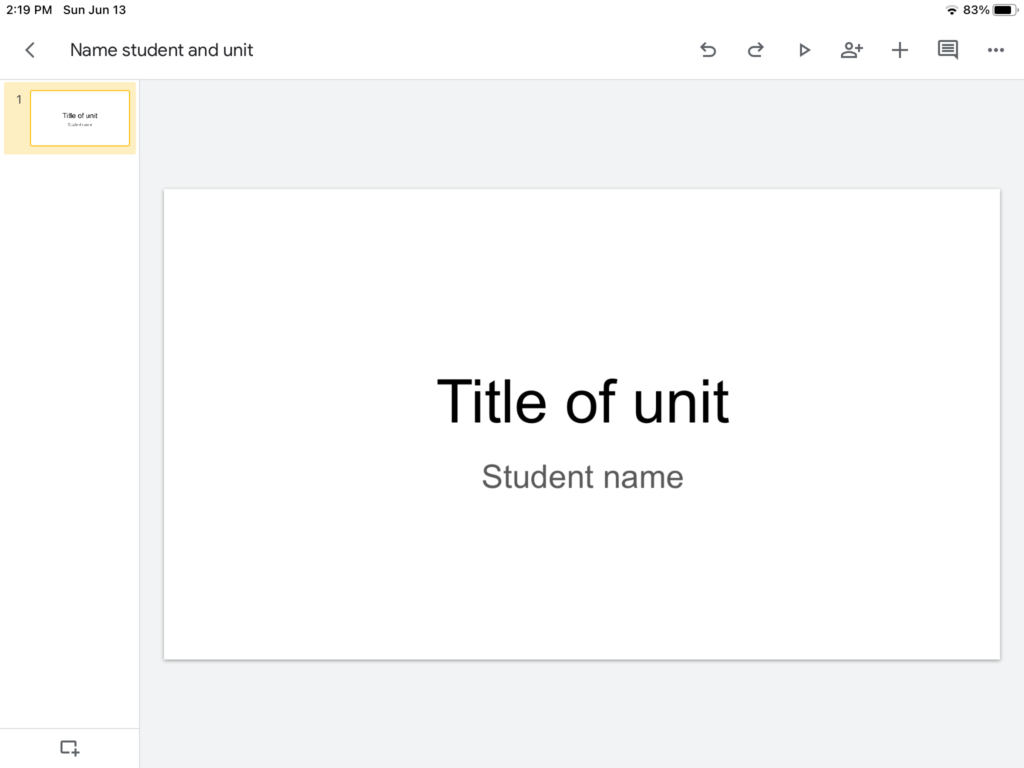
They should use the plus icon, on the bottom left-hand corner of the screen, to create a title slide. They should include the title of the unit and their full name. My students like to go back later and add lots of images and drawings to this title slide. I also have several title templates that I send to them to use.
Students Share Their Digital Notebook with You.
The best part of this digital science notebook is the real time assessability that you will have once the student share the presentation with you. Students should hit the icon in the upper right hand corner, that looks like a little person, and they will be given a place to type in YOUR EMAIL ADDRESS.
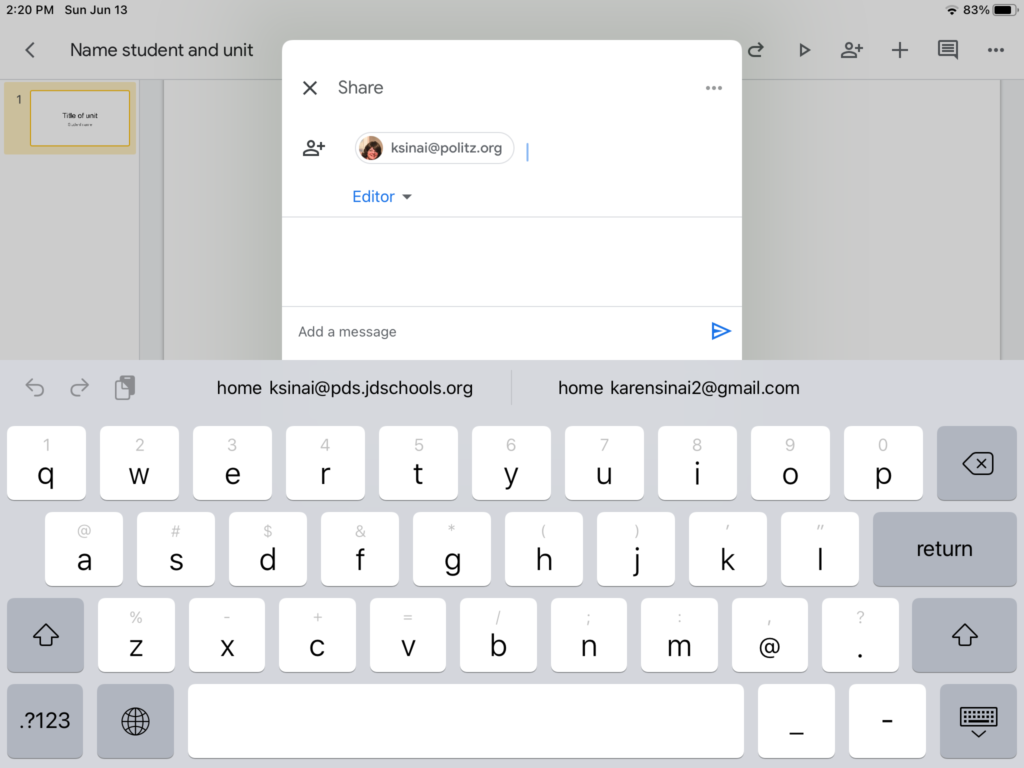
You will get an email notification that the student wants to share the presentation with you. When you click on “Open in Slides“, you’re now ready to see their presentation in your Google Slides app.
Creating a Basic Table of Contents
Even when I had paper science notebooks I always required a table of contents at the beginning. This served the purpose of keeping the students organized and I could see the assignments at a glance. There are two different ways of making a table of contents.
1) Simple Slide Titles
2) Hyperlinked Slide Titles
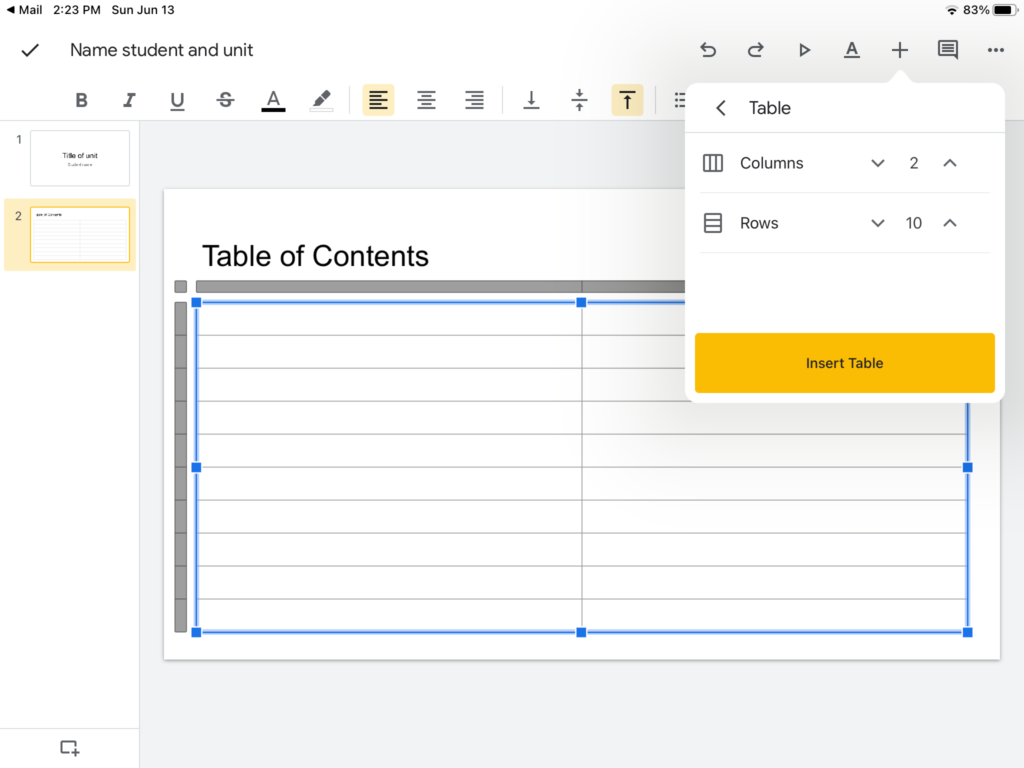
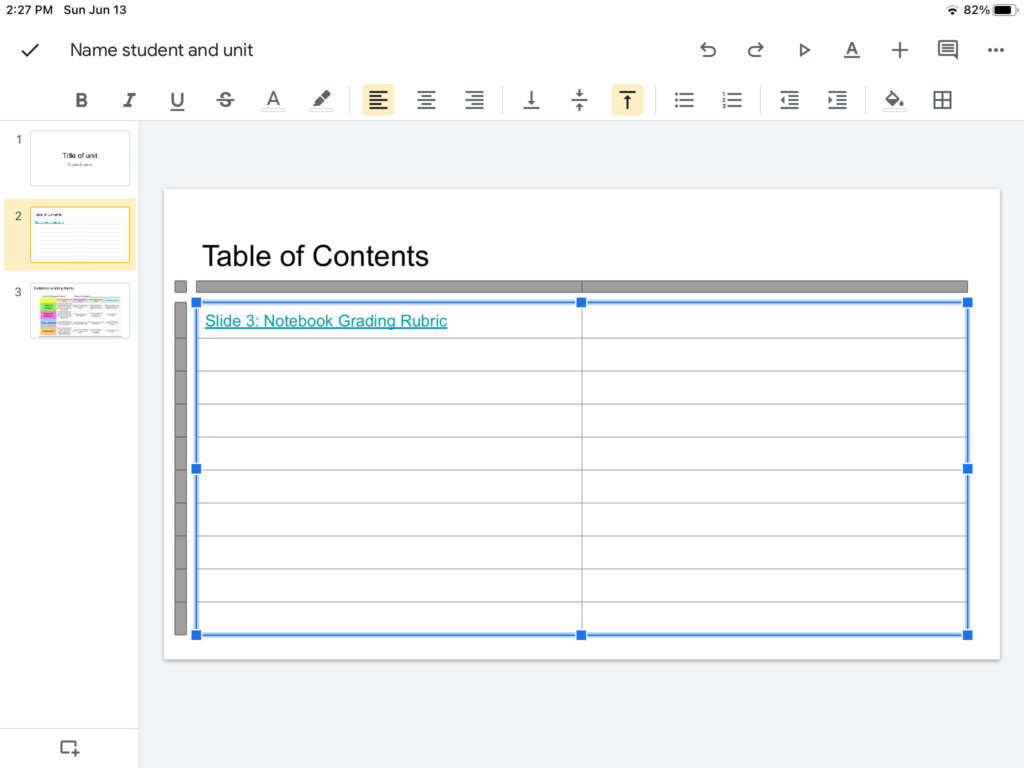
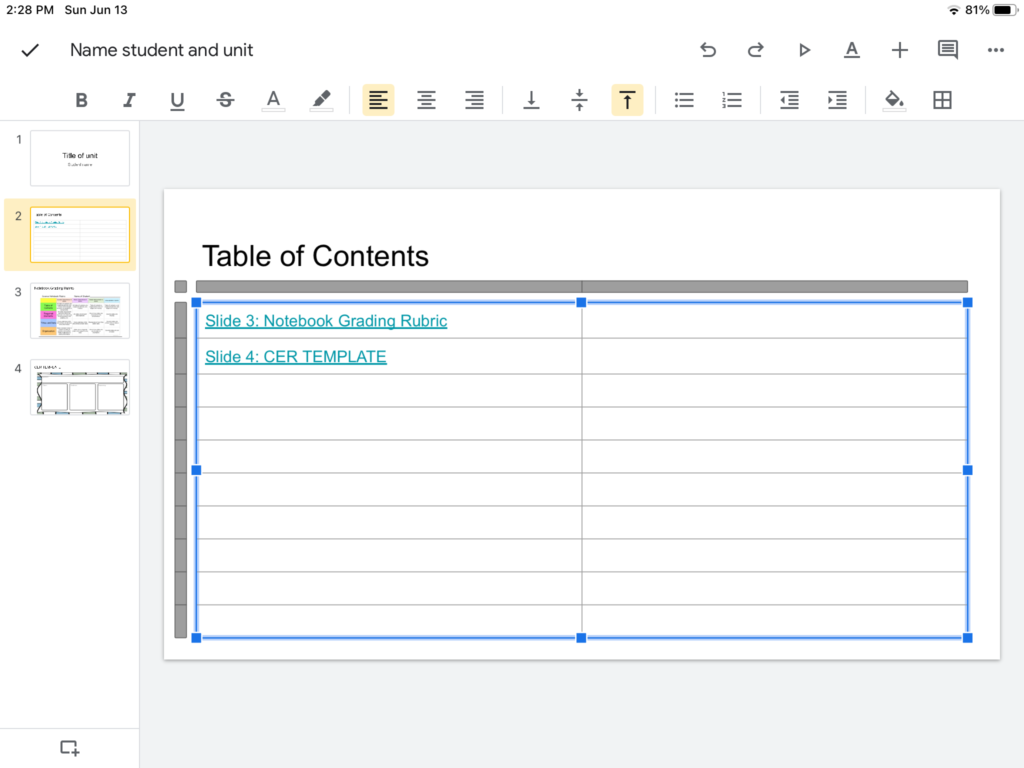
For both methods, students start by creating a table. They go to the upper right hand corner and click on INSERT TABLE. I have found that the dimensions that work best are two columns and 10 rows.
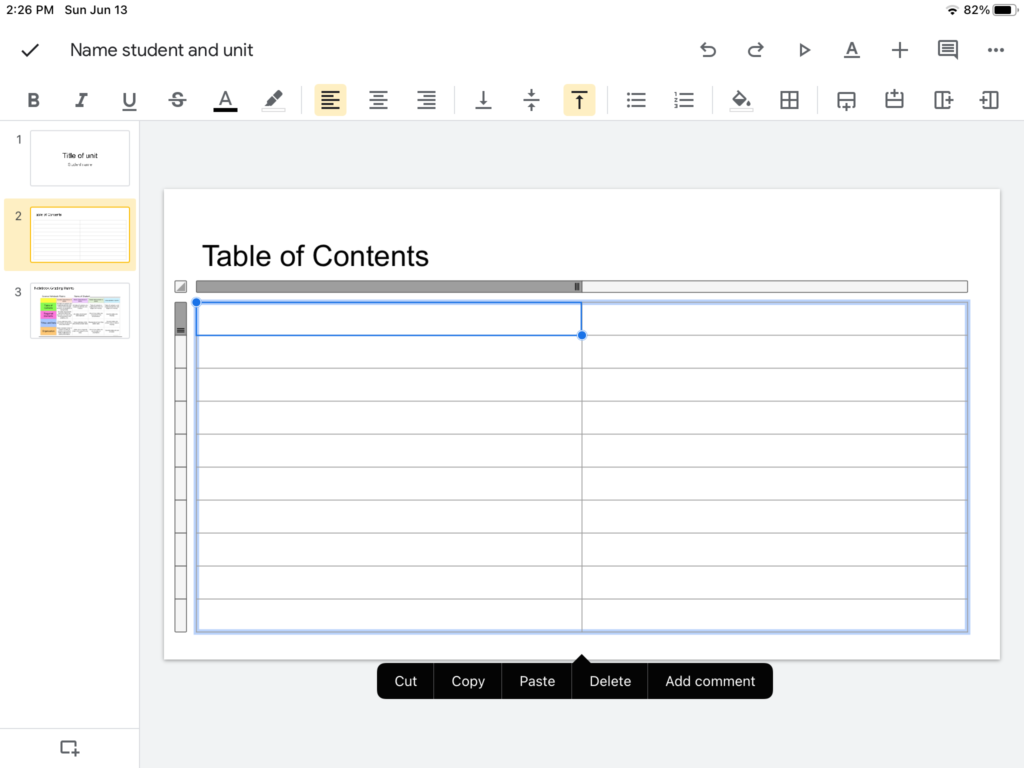
With the basic table of contents, each time students create a new slide they name it and add it to this chart in chronological order.
Note: when students are creating a new slide, I highly recommend using the “Title Only” slide format. This encourages the students to always label their work and makes the hyperlinks much easier.
How to Create a Hyperlinked Table of Contents
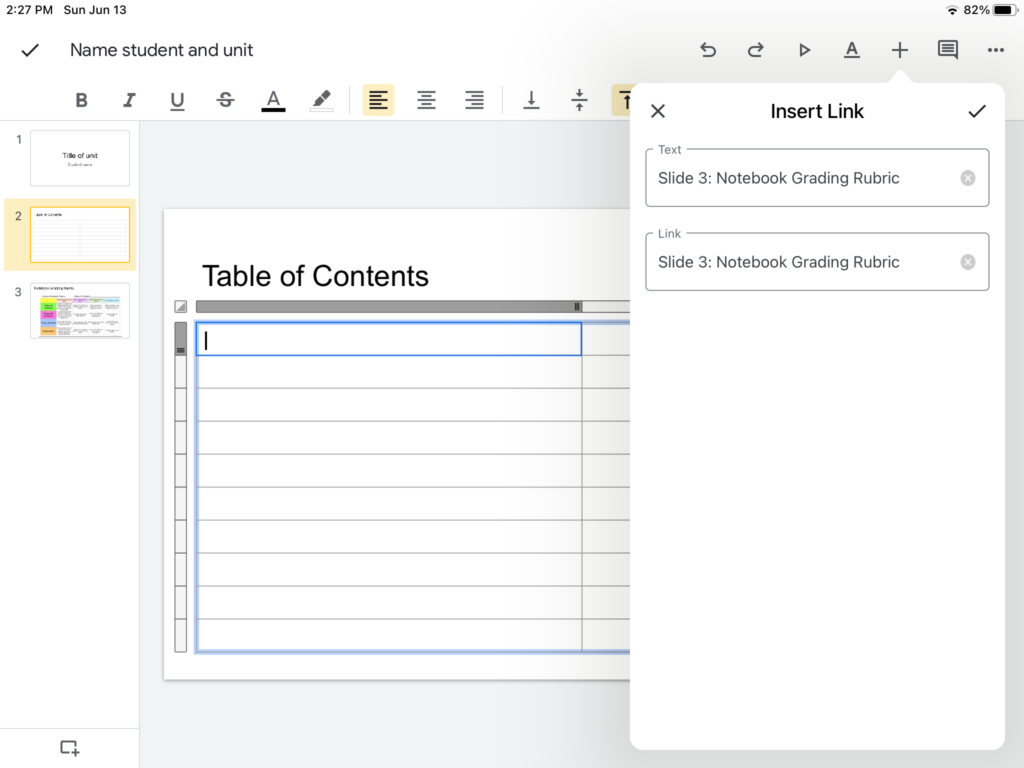
I prefer hyperlinks in the table of contents because it makes grading the longer notebooks much easier. I can simply put it into presentation mode(arrow at the top right) and then hit the hyperlink that I need to grade an assignment.
Students should click on the first cell of the table and then go to the upper right hand corner to click on INSERT LINK. They will see the titles that they have created for each slide or it will simply say “Slide 1 or “Slide
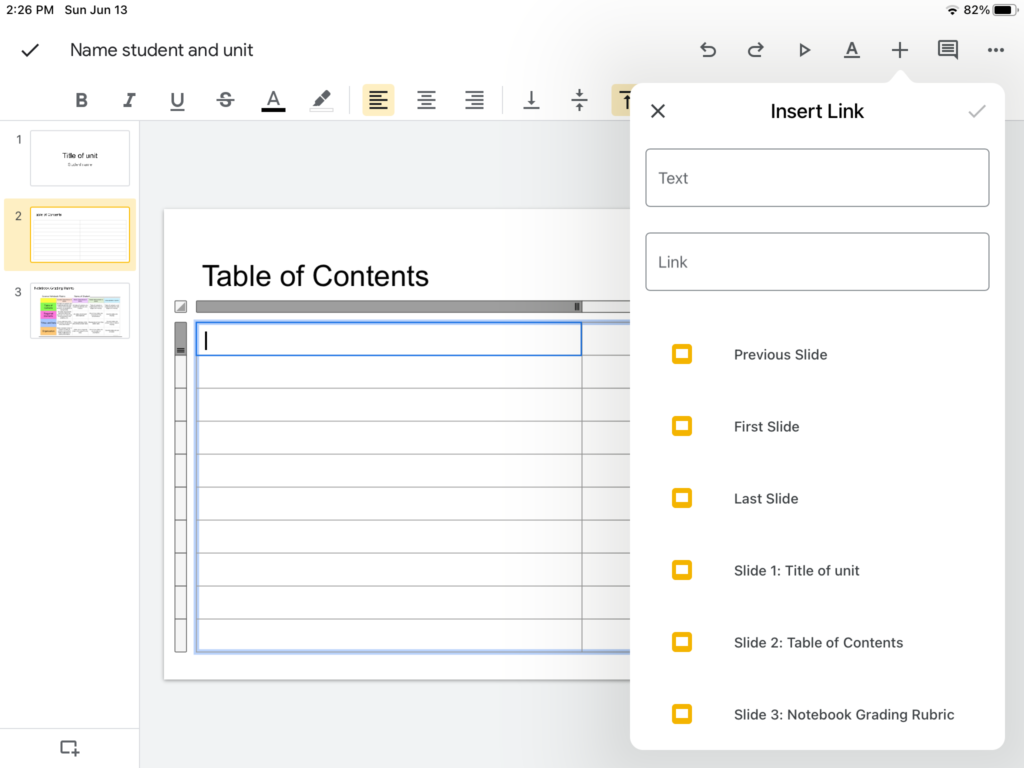
When the student clicks on the name of the slide it will add a hyperlink from that slide to the cell in the table of contents.
Note: In the beginning of the school year I send the students many templates that I created. I send them templates for Cornell notes, video notes, class notes, CER templates and lab reports. They keep these images in their camera roll so that they can insert them as background images when they need them. Of course, some students want to make their own templates and do a beautiful job at that!
What Should Students Add to Their Digital Notebooks?
The simple answer? Everything!
By the time they are done each unit, they will have a whole story in chronological order of what we covered and how they personalized it.
Examples of what they may add:
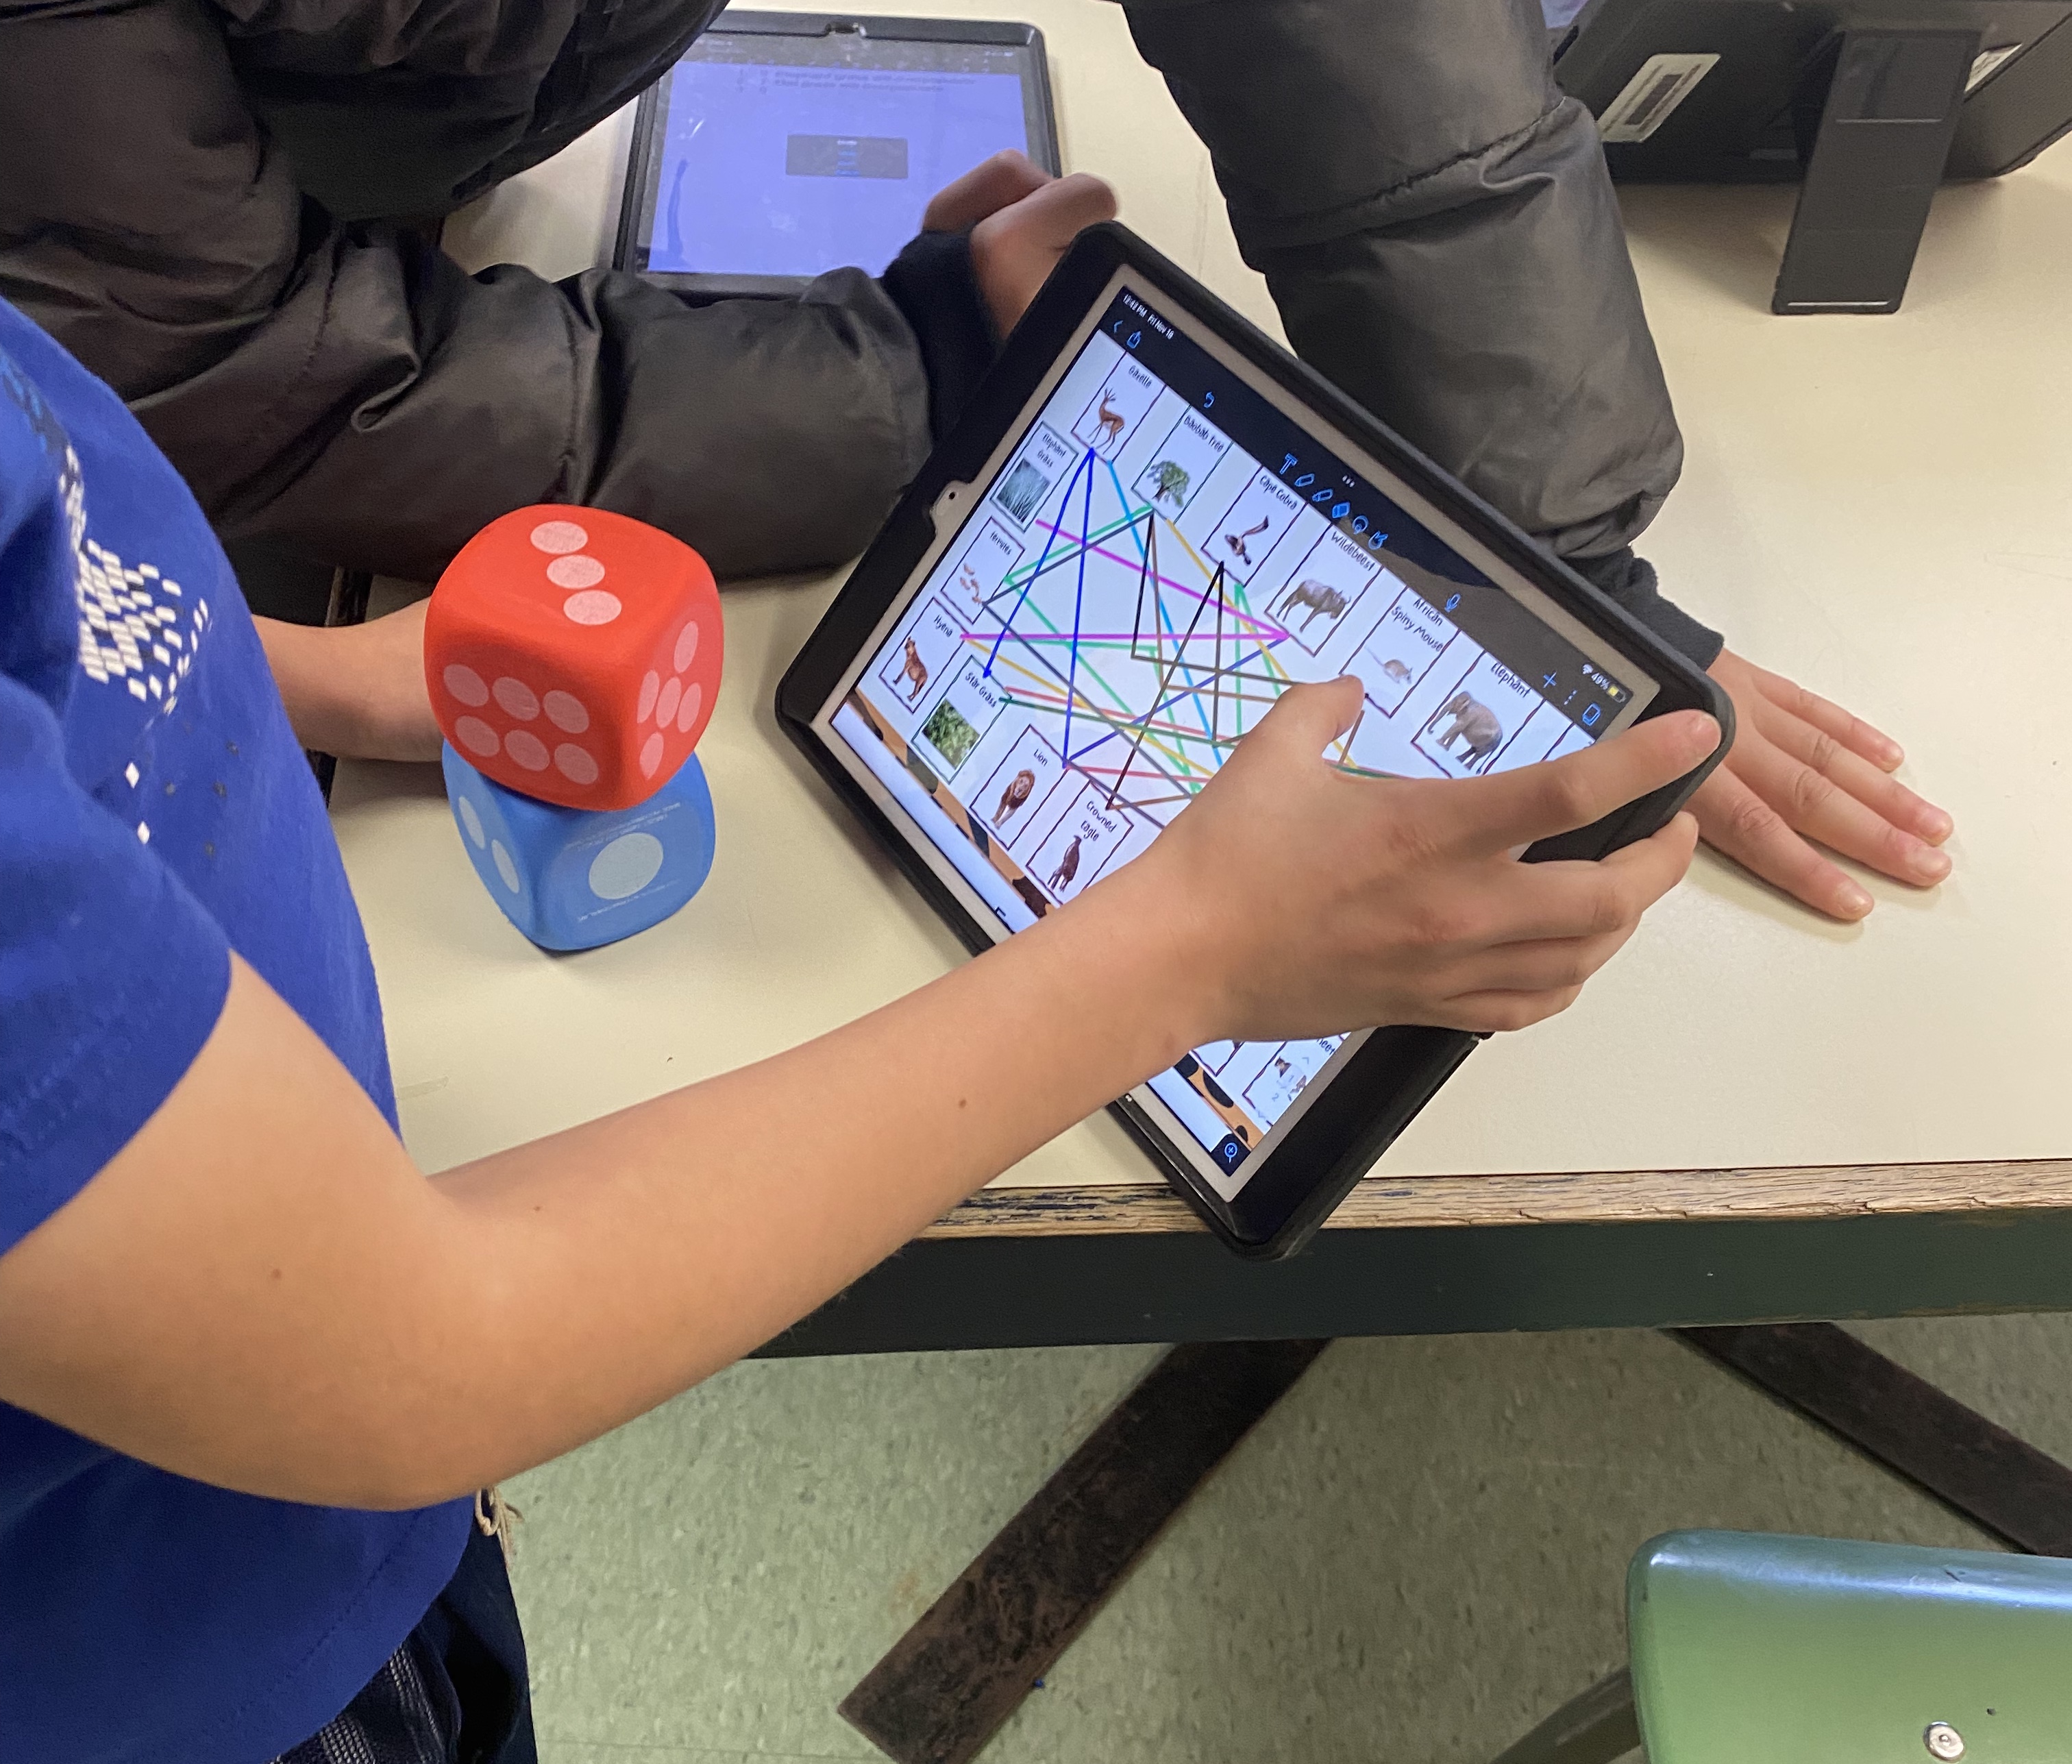
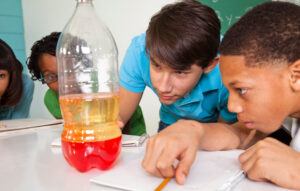
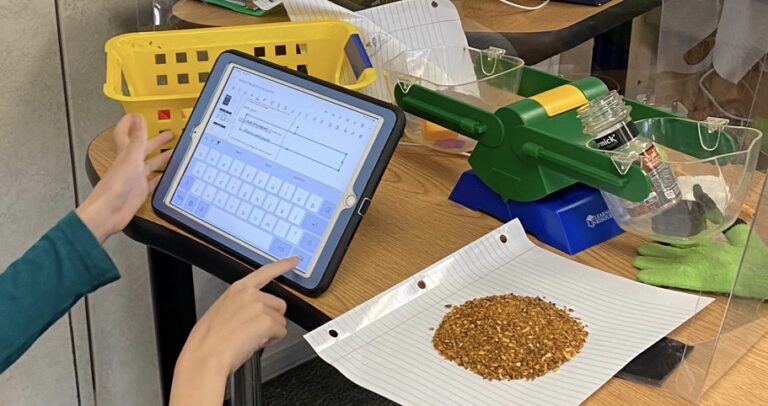
- Photos of labs, some with annotations
- Photos of outdoor exploration
- Videos of projects
- Project rubrics, daily journals and self assessments
- Slow motion videos of lab results such as chemical reactions or ball collisions
- Time lapse videos of clouds, storms, plants, etc
- Cornell notes with templates from textbooks, websites, articles, etc.
- Video Notes with templates while watching YouTube videos
- Class Notes using templates for background information “ lectures”
- CER Templates for multiple activities including photo prompt bell ringers
- Mini or more developed lab reports using templates
- Graphs created on Excel, Numbers or Google Sheets
- Drawings created on multiple sketching apps
- Interactive slides with labeling or drag and drop activities that I send them
- Photo or research prompts that I send them
- Videos and photos that they take through the microscopes of pond water, prepared slides, etc.
How Do You Grade the Digital Science Notebooks?
One of the great features about having a shared document with each student is that the student is never sure when you were going to check their assignments! I quite often do a complete/incomplete grade in my grade book without the students being aware.
Another nice feature of Google Slides is that you can make comments on a student’s slide that will show up as an email to them. When they resolve the comment it will come back to you in an email so you know they have acknowledged your comment.
It is so nice to be able to speak privately, via adding comments, to a student during quiet work time to either praise them, help them or bring them back on track. Nobody is the wiser that you’ve had any communication with an individual, which can be very important to a middle schooler who is easily embarrassed.
One of the reasons that my students are so conscientious about their notebooks is that they know at the end of each unit they will be graded with a rubric. I give the students the rubric at the beginning of each notebook so they always know the expectations. When it comes time for me to grade, I simply circle the parts of the rubric with the “SHAPES” feature. The digital notebook grading rubric that I use is free and I have tweaked it for many years.
How Digital Notebooks Help With uStudying For Finals
Although I am 100% digital in my classroom, I still believe in paper tests and quizzes. If there is any student who is a little bit slower with technology, I don’t want them to be at a disadvantage.
When students take a test or quiz we go over the answers and correct them. Once this is completed, students take a good, clear photograph of each page and place that as the last page of their science notebook. This way, when it comes time to study for the final, they have the entire notebook and the assessment use. This has proved invaluable for both students and parents.
Bonus:I don’t teach the exact same material every year and it can be hard to remember what I did and didn’t include. I can pull up the student notebooks to use as a guide while I’m writing the final.
How to Preserve These Wonderful Creations!
I love the way the students take great pride in their notebooks and it’s always a little sad to move onto a new one or to move onto another year. Most students ask if they can save their notebooks so we have experimented with different ways of making that efficient.
Each student has their own Google Drive account, since they are on Google Slides, so we save the notebooks on there first. If students want to keep them after they graduate they can log into their Google Drive from home and download their notebooks.
I have students save the presentations as a PDF file which is easy to scroll through if they ever need to access them in future years. I teach fifth through eighth grade science and my students love to go back and look at their older notebooks. Every once in a while will play scavenger hunt and have them go search for a past topic in their old notebooks. They love that!
Note: At the end of each school year, I download one student notebook from each unit, which works as a great pacing guide for me as I plan for the following year.
Conclusion
There are so many benefits to using digital science notebooks and I hope you realized this throughout this post. I would love to see examples of your student notebooks after you have tried this out! Please check out my store, Science by Sinai at Teachers Pay Teachers, with hundreds of science resources, including digital notebook templates.

- Embracing The Mess: Why a “Messy” Science Classroom is a Good Thing
 Embracing The Mess: Why a “Messy” Science Classroom is a Good Thing Do you have a messy science classroom? Are supplies scattered everywhere, with half finished…
 - Why Digital Science Notebooks Make the Ultimate Study Guide
 Why Digital Science Notebooks Make the Ultimate Study Guide Do you find that your students don’t know how to study for tests?Are they losing papers, forgetting…
 - 10 Tips For Engaging Disinterested Students
 10 Tips For Engaging Disinterested Students We all know the struggle of engaging disinterested students no matter how hard we try. Over the years, I’ve found…

Just read your digital notebook post. I’m intrigued. When do students work on them? Do they take notes on paper during class and an assignment is to create a summary slide for that day/topic?
I like the idea of all their notes in one place and them controlling what it looks like but I don’t want them to be on the computer all the time. We have lab books they need to use and I give them papers which they store in the lab book.
Thanks
I use them in place of paper but, that said, I have students that would prefer to work on paper and then photograph their finished product into the notebook. I told them that I don’t mind what they use as long as it is digital at the end of class. Some students love to take notes straight on their iPad into their notebooks, during class, and have no problem. Other students do prefer paper.
Quite often I will do printed out lab sheets that I know are going to get messy that they use during class. I then give them a digital version for them to “clean up“ for homework. Also, I do this if I’m doing a lab that has liquid, since I don’t like their iPads to be out.
I also require the students to always have a folder for any handouts that I give them isn’t necessary to be in their notebooks.
Please feel free to ask any questions and if you need any help with set up, or the mechanics of these notebooks, just let me know!