Are you teaching chemistry to middle school students and you need help with the scope and sequence? How do you introduce chemistry to prepare the students for understanding more complex concepts later?

written by
Karen Sinai

7 Steps to Teaching Chemistry to Middle School Students
May 2022
This is introductory unit involves teaching chemistry to middle school students so that they completely understand the basics of atomic structure, analyzing molecules and simple chemical equations before they move on to more complicated chemical concepts .
Students keep this introduction unit in their digital science notebooks to refer back to as they advance through chemistry.
Step #1: What is an atom?
The idea of a tiny little structure, that is not living, and makes up everything on our planet it’s not so easy to grasp. Students have seen the standard drawing of an atom with the nucleus, protons, neutrons and electrons, but do they understand it?
I really like introducing this hard concept with this excellent video.
This super video discuss the SCALE of a single atom.
Step #2: Introduce the Amazing Periodic Table
Teaching chemistry will, of course, involve the periodic chart, but let’s give students the background of the incredible genius behind it!
We look at the rows and columns and learn the atomic number, which is number of protons. I also boggle their minds with how, beside the atomic number, the chart lines up SIMILAR chemicals in terms of electrical conductivity, metals or nonmetals, melting points, etc. Just incredible!
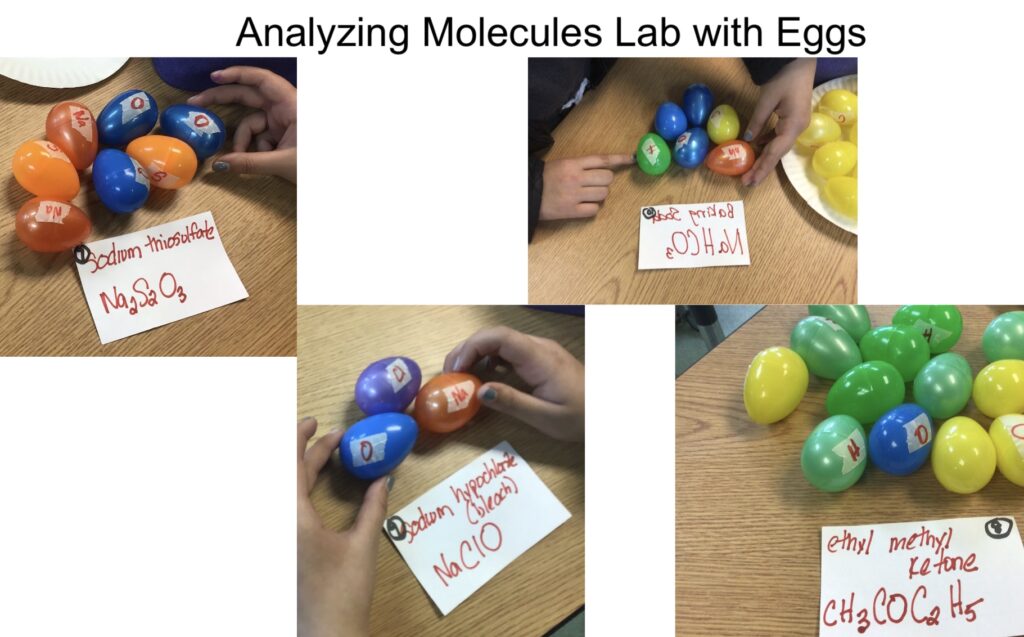
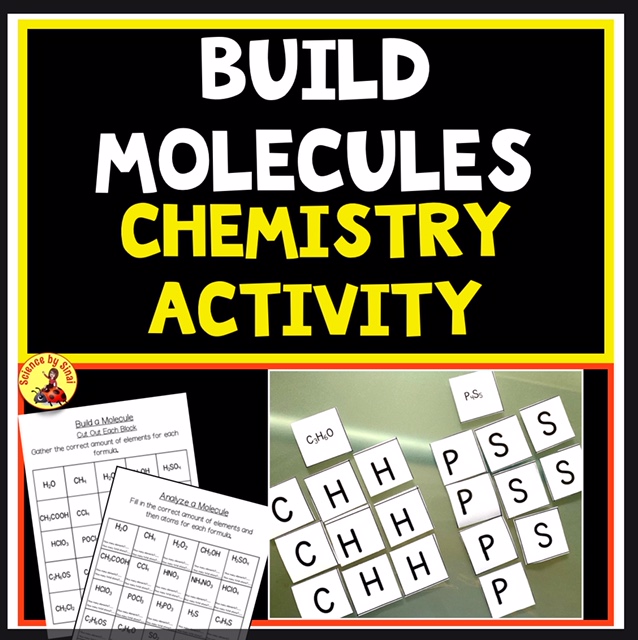
Step #3: Analyzing Molecules Using Easter Eggs
Let’s now introduce the basic vocabulary of atom, element, formula, molecule, and compound. These can be confusing at first. I use Easter eggs to show how molecules are created by putting elements together.
Students are given cards, with a formula written on it, and they gather the eggs to assemble the molecule.
This illustrates how the subscripts are used in a formula rather than just doing it on paper. I also slowly introduce having parentheses in a formula. Once they seem to grasp those, I hand students cards with coefficients added in front of the formulas. This helps students solidify how the molecule changes which prepares them for balancing equations.
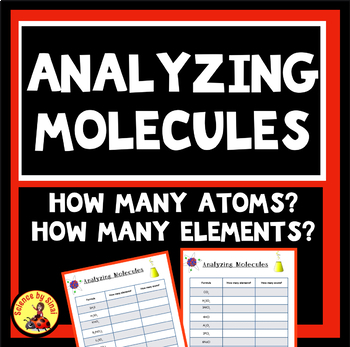
As a reinforcement to the Easter egg activity, I give them my two worksheets to practice counting the amount of atoms and elements in formulas. One of the worksheets is straightforward, with no parentheses, and the second one is a bit more complicated with them.
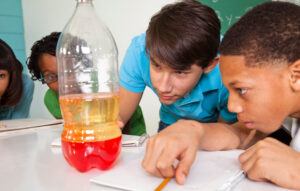
Step #4: Introduce Chemical Equations with a Mystery Lab
At this point, I introduce equations and how “what goes in must come out”. We do the well-loved baking soda and vinegar lab.
However, I don’t tell them what the chemicals are!
I make a big deal about them wearing goggles and and I use the scientific names of acetic acid and sodium bicarbonate. I have them take slow motion videos( see my blog post called 13 Ways Using Photography Helps You Teach Science) of the moment when the two chemicals touch each other. At this point, some of the students will figure out what the chemicals are, based on their previous experiences. We put the equation on the board and talk about what exactly was going on.
- What chemicals went into the reaction? the acetic acid and sodium bicarbonate were REACTANTS.
- What chemicals came out of the reaction? Sodium Acetate, water and Carbon Dioxide are the PRODUCTS.
- What were the bubbles? Carbon Dioxide
- How do we show gas being released when we write an equation? Up arrow.
- Where did the gas go? in the room

On the baking soda and vinegar equation I draw lines, or diagram, to show how each chemical that went into the reaction came out. Not only did each chemical that went in come out, it came out with an exact equal amount.
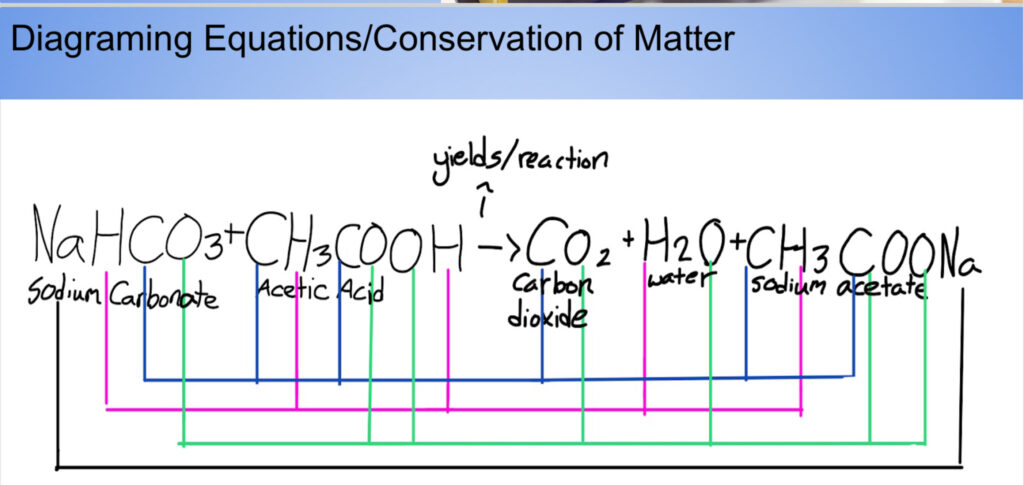
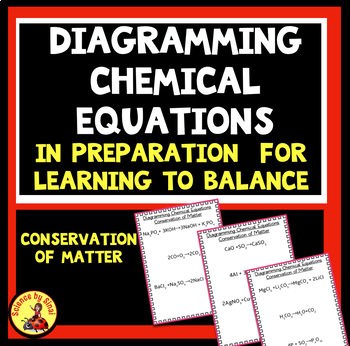
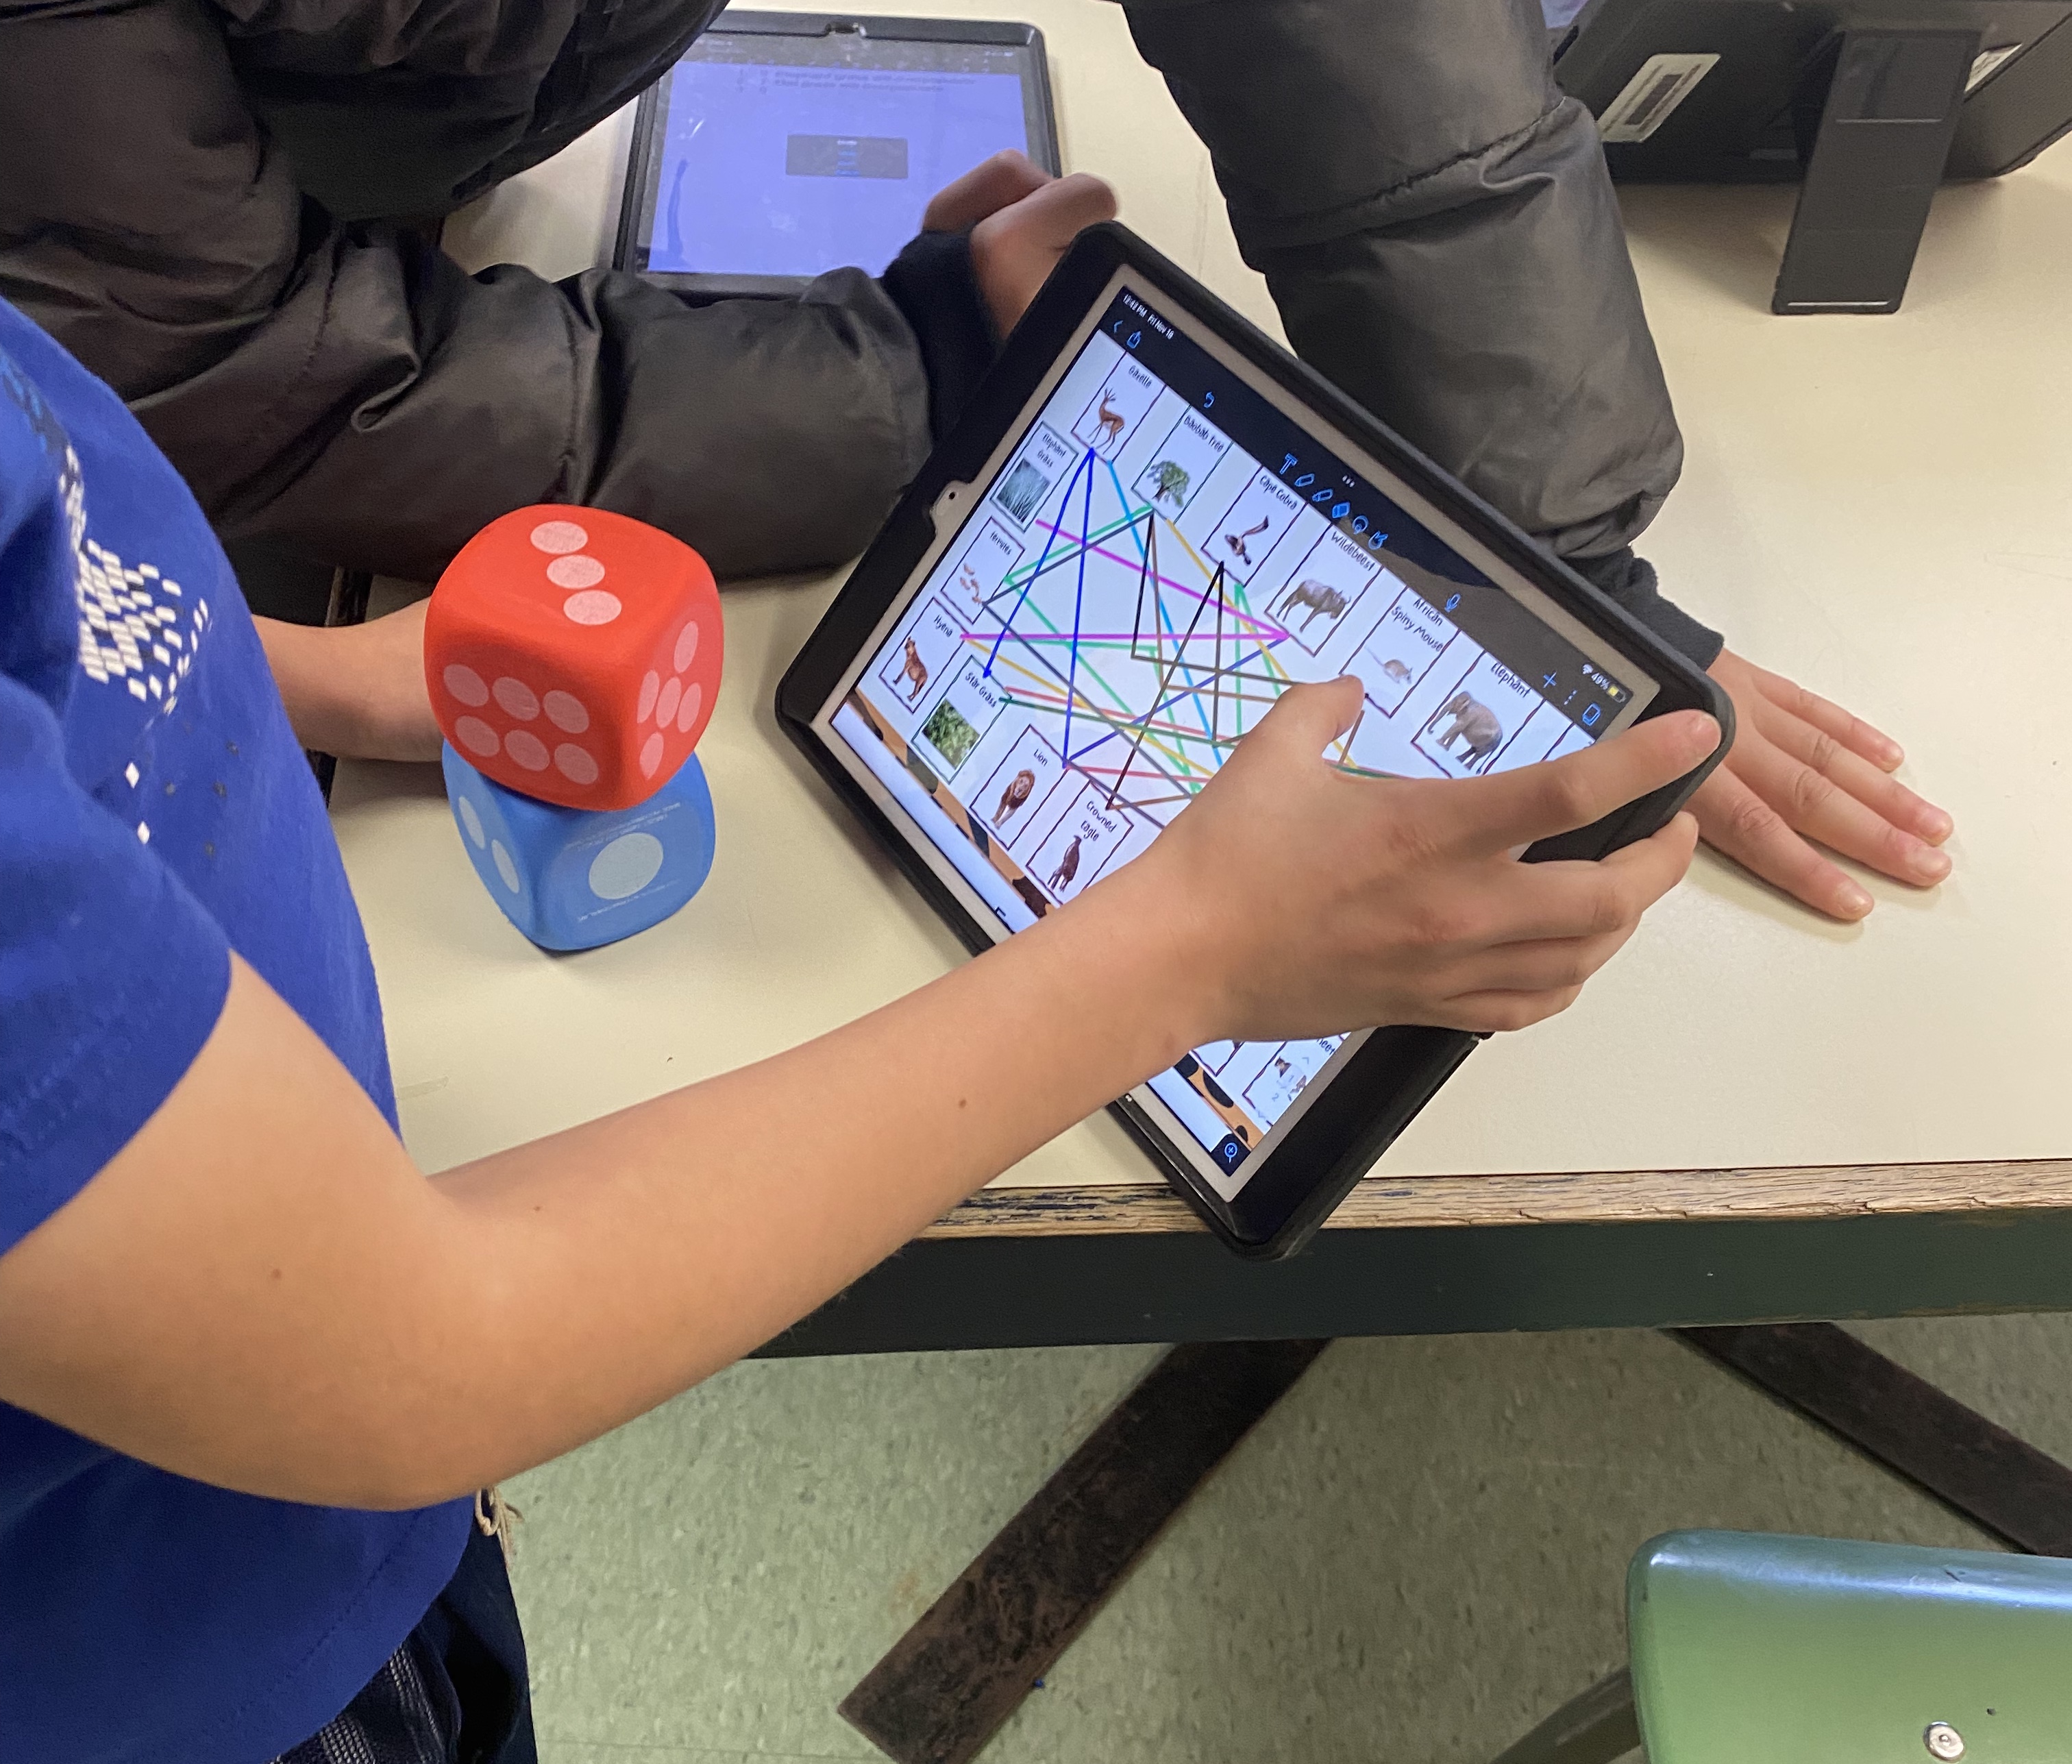
Step #5: Diagram Chemical Equations
Analyzing the baking soda and vinegar equation leads me into my diagramming activity to prepare them for balancing equations.
Students draw colored lines connecting the reactants to the products.
They may struggle a bit with multiple molecules having the same elements. I have them write the total amount of each element on the diagramming activity.
(See my video below.) I take the Easter eggs out again to illustrate one or two of the equations.
Step #6: Introduction to Balancing Chemical Equations
So now onto the hardest part of teaching chemistry; balancing chemical equations! Some middle schools don’t address this at this age but I find that my alumni come back and thank me for “making them“ do it in eighth grade. Apparently most high school teachers tend to assume they’ve had it or that they are able to get it very quickly in high school. Many students struggle with the idea.
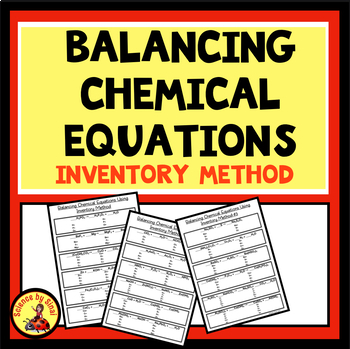
When introducing balancing, I prefer to use the methodical inventory method where the students analyze both sides of the equation first. This helps make patterns obvious, such as doubling or tripling one side to balance the other side. They may need to see a “common denominator“ such as a two or a three to get six on both sides.
Secret to teaching balancing equations? Practice, practice, practice.
I give them three levels of worksheets and I have them work together with students who grasp the concept more quickly.
Step #7: Relating Chemical Equations to Real Life Examples
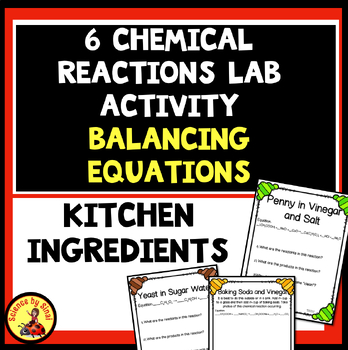
Once we have practiced, it is time to see the equations in action! We begin with my kitchen chemistry activity where the students do the labs and then look at the equations.
They work on balancing them and diagramming them which makes this a much more concrete concept.
For example, when we put an egg in vinegar, we see bubbling and a change overnight to the shell of the egg. The hard shell basically disappears and we are left with a rubbery egg and sort of foamy liquid.
What in the world happened? What was the chemical component of the shell and where did it go? By looking at the actual equation the student start to understand that we are no longer looking at what feels like a math problem, but real life chemistry!
Conclusion
After we have completed this part of the unit, I usually give a quiz before I move on to the four types of chemical reactions of synthesis, decomposition, single replacement and double replacement. That’s when we pull out the “real” chemicals and the students just love it!
Looking for more science resources? Please visit my store at Science by Sinai on Teachers Pay Teachers for hundreds of activities.

- Embracing The Mess: Why a “Messy” Science Classroom is a Good Thing
 Embracing The Mess: Why a “Messy” Science Classroom is a Good Thing Do you have a messy science classroom? Are supplies scattered everywhere, with half finished…
 - Why Digital Science Notebooks Make the Ultimate Study Guide
 Why Digital Science Notebooks Make the Ultimate Study Guide Do you find that your students don’t know how to study for tests?Are they losing papers, forgetting…
 - 10 Tips For Engaging Disinterested Students
 10 Tips For Engaging Disinterested Students We all know the struggle of engaging disinterested students no matter how hard we try. Over the years, I’ve found…


When do you cover physical and chemical changes, and mixtures and compounds?
I usually do physical and chemical changes right after this unit, then I go through the different types of chemical reactions, and then I do a unit on mixtures and solutions. I used to have a textbook that did it in this order and I’ve just stuck by it for all of the years afterwards. I’m going to do a blog post soon on my next steps. 😊
Do you have a lab write up for “Analyzing Molecules Using Easter Eggs”?